Tag: recipe

Crispy Chicken Parm Smashed Tacos

Crispy Chicken Parm Smashed Tacos

Quick chicken parm tacos made by pressing seasoned ground chicken onto tortillas, coating in panko, pan-cooking until set, then finishing in the oven with tomato sauce and melted cheese. Prep Time:10minutes minsCook Time:20minutes minsServings:5 Tacos Ingredients For Chicken Tortilla / Assembly Instructions  Take a second to press it 

Banana Bread Scones with Toasted Sesame Icing

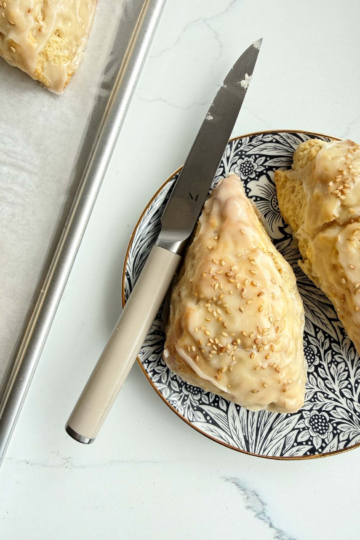
Banana Bread Scones with Toasted Sesame Icing

These flaky banana bread scones are soft and tender, packed with ripe banana flavor. They’re finished with a nutty sesame icing while they’re still warm, helping to keep them moist. Prep Time: 20minutes minutesCook Time: 22minutes minutesServings: 8 scones Ingredients Sesame Icing Instructions For the scones For the toasted sesame icing 

Raspberry Lemon Cheesecake Bars

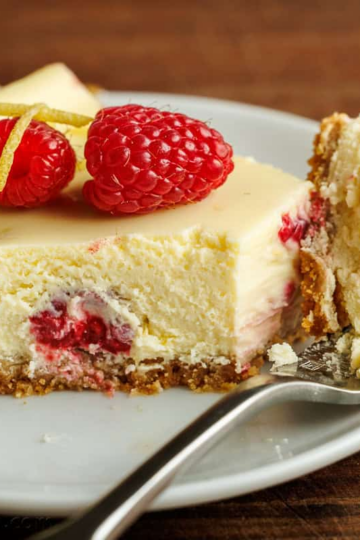
Raspberry Lemon Cheesecake Bars

Raspberry Lemon Cheesecake Bars have the best creamy and fluffy texture and plenty of fresh raspberry and lemon flavor in every bite. It’s such a treat. Cheesecake Bars are one of the easiest cheesecakes you’ll make, and they keep well in the fridge and freezer, so you can make it ahead. You’ll love these easy, creamy bars.

Prep Time: 30minutes mins
Cook Time: 50minutes mins
Cooling Time: 6hours hrs
Servings: 16 bars

Ingredients

Graham Cracker Crust

  • 2 cups graham cracker crumbs
  • 1/2 cup unsalted butter, melted
  • 1 Tbsp sugar
  • 1 pinch fine sea salt

Cheesecake Filling

  • 32 ounces cream cheese, softened
  • 1 1/4 cups sugar
  • 5 large eggs, room temperature
  • 2 Tbsp sour cream
  • Zest of 1 lemon, plus more for garnish
  • 1 Tbsp lemon juice
  • 1 1/2 tsp vanilla extract
  • 1/8 tsp fine sea salt
  • 12 oz raspberries*, plus more to garnish

Instructions

  • Prep the pan – Preheat oven to 350°F. Brush a 9×13-inch metal baking pan lightly with butter to help the parchment stick. Line with parchment paper, leaving overhang on the sides for easy lifting.
  • Make the crust – In a bowl, stir together the graham cracker crumbs, sugar, and salt. Then stir in melted butter and mix until evenly moistened. Press firmly into the bottom of the prepared pan. Bake for 8 minutes. Remove and let cool. Reduce oven temperature to 325°F.
  • Make the filling – In the bowl of a stand mixer with the paddle attachment (or a large mixing bowl with an electric mixer), beat the cream cheese and sugar on high speed with the paddle attachment for 5 minutes, or until smooth and fluffy, scraping down the bowl as needed for a smooth mixture.
  • Finish the filling – Reduce the speed to medium and add the eggs one at a time. Add the sour cream, lemon zest, lemon juice, vanilla, and salt, and mix just until smooth, scraping down the bowl as needed.
  • Add raspberries – gently fold in raspberries until evenly distributed. Pour the filling over the cooled crust and spread evenly. Tap the cheesecake on the counter a few times to release bubbles then pop them with a toothpick.*
  • Bake at 325˚F for 45-50 minutes, until the center is nearly set and has a slight wobble when you jolt the pan. Let cool in the pan to room temperature, about 2 hours, then cover with foil and refrigerate for at least 4 hours* or until fully chilled. Avoid covering with plastic wrap, which can cling to and ruin the top of the cheesecake.
  • Serve – Carefully lift the chilled cheesecake out using the parchment overhang. Slice into bars and serve garnished with fresh raspberries and lemon zest ribbons.

Notes

*Dry raspberries – Make sure raspberries are thoroughly patted dry with paper towels to avoid adding excess water to the cheesecake.

*Release air bubbles – Tapping the baking dish on the counter a few times can help release bubbles to the surface. Popping the bubbles with a toothpick can prevent cracks in the top of your cheesecake.

*Chill overnight for the neatest slices and wipe the knife between cuts for cleaner bars.

Storage and Make Ahead – Once the cheesecake bars are  baked, cool to room temperature before storing

  • To Refrigerate – cover and refrigerate for up to 4-5 days. Add the fresh raspberries and lemon zest garnish just before serving.
  • To Freeze – Wrap the bars in an airtight, freezer-safe container, or with foil to prevent drying out. Freeze for up to 3 months, and then thaw overnight in the fridge. Garnish before serving.

Nutrition Per Serving

391kcal Calories30g Carbs6g Protein28g Fat

Smashed Sweet Potatoes

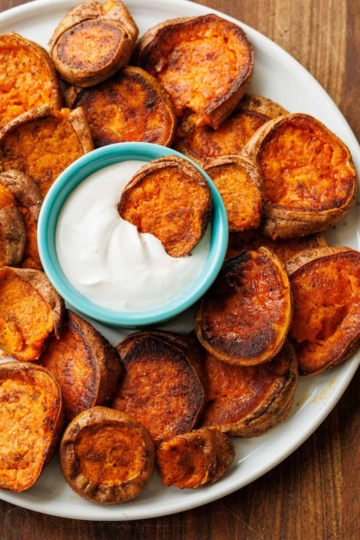
Smashed Sweet Potatoes

Easy smashed sweet potatoes are the perfect crispy finger-food side dish or appetizer for every entree pork, steak, chicken, burgers, and seafood. Each bite is soft and savory in the center with a crispy outside. you can serve with a quick homemade lemon-garlic dip. It’s 

Green Chile Chicken Enchilada

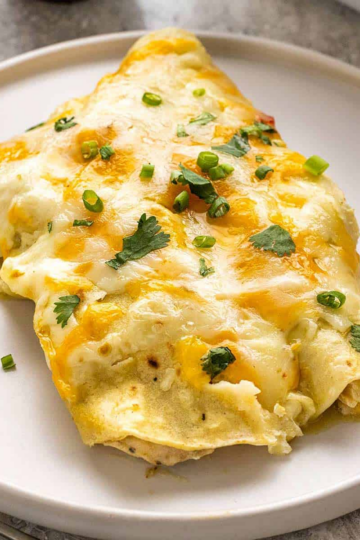
Green Chile Chicken Enchilada

Whether you’re feeding a hungry crowd or looking for tasty leftovers to enjoy throughout the week, this enchilada pie has you covered. It’s a perfect balance of protein, vegetables and cheesy goodness. It’s a satisfying meal that’s as nutritious as it is delicious. Prep:30 minCook:4 hoursYield:6 servings 

Smashed Dumpling Tacos

Smashed Dumpling Tacos

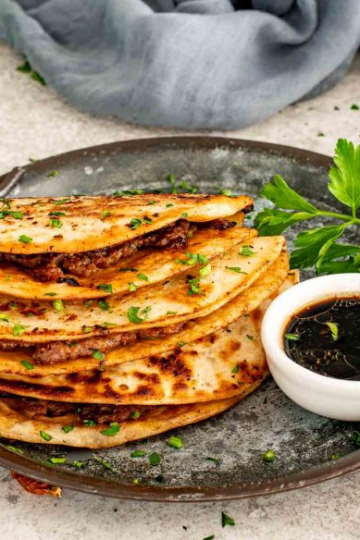
Smashed Dumpling Tacos bring together everything great about dumplings and tacos in one very crispy, very addictive bite. Juicy, seasoned pork is pressed straight onto tortillas and cooked until golden and crackly, then folded up and dunked into a simple soy dipping sauce. They’re fast, fun, and way more satisfying than they have any right to be.

Prep 10minutes minutes
Cook 20minutes minutes
Servings 8

Ingredients

For the Filling

  • ▢1 pound ground pork (or ground chicken)
  • ▢3 green onions (finely chopped)
  • ▢2 cloves garlic (minced)
  • ▢1 tablespoon fresh ginger (grated )
  • ▢2 tablespoons soy sauce
  • ▢1 tablespoon sesame oil
  • ▢1 teaspoon sugar
  • ▢½ teaspoon salt
  • ▢¼ teaspoon black pepper

For the Tacos

  • ▢8 small flour tortillas (street-size)
  • ▢2 tablespoons vegetable oil (divided)

For the Soy Dipping Sauce

  • ▢¼ cup soy sauce
  • ▢2 tablespoons rice vinegar
  • ▢1 teaspoon sesame oil
  • ▢1 teaspoon sugar (or honey)
  • ▢1 clove garlic (finely minced)
  • ▢½ teaspoon chili oil (optional)

Instructions 

  • In a bowl, combine 1 pound of ground pork, 3 green onions, 2 cloves of garlic, 1 tablespoon of ginger, 2 tablespoons of soy sauce, 1 tablespoon of sesame oil, 1 teaspoon of sugar, ½ teaspoon of salt, and ¼ teaspoon of black pepper. Mix gently until just combined.
  • Lay the tortillas on a work surface. Divide the filling evenly among them, spreading about 2 to 3 tablespoons of filling over one side of each tortilla. Press it down firmly so it’s thin and even.
  • Heat 1 tablespoon of vegetable oil in a large nonstick or cast-iron skillet over medium heat. Place the tortillas meat-side down in the pan. Cook for 4 to 5 minutes, pressing gently with a spatula, until the meat is cooked through and deeply golden. Flip the tacos and cook for 2 to 3 minutes, until the tortilla is crisp and lightly browned.
  • Fold each tortilla in half like a taco. Cook for another 1 minute per side to crisp the edges. Transfer to a plate and repeat with remaining tacos, adding the remaining 1 tablespoon of oil as needed.
  • In a small bowl, whisk together ¼ cup of soy sauce, 2 tablespoons of rice vinegar, 1 teaspoon of sesame oil, 1 teaspoon of sugar, 1 clove of garlic, and ½ teaspoon of chili oil if using.
  • Serve hot with the soy dipping sauce on the side.

Equipment

Notes

  1. Meat options: Ground pork gives you the best flavor, but ground chicken works great too. Just don’t overcook it or it’ll dry out.
  2. Press it thin: The thinner you spread the meat, the crispier it gets. Press it down well before it hits the pan.
  3. Use a nonstick or cast iron skillet: You want good contact with the pan so the meat browns properly.
  4. Don’t rush the flip: Let the meat side cook fully and get golden before flipping. If it sticks, it’s not ready yet.
  5. That soy dipping sauce is not optional. It pulls everything together and balances the crispy, savory filling.
  6. Make ahead tip: You can mix the filling a few hours ahead and keep it covered in the fridge until ready to cook.

Nutrition Information

Serving: 1servingCalories: 308kcal (15%)Carbohydrates: 17g (6%)Protein: 13g (26%)Fat: 20g (31%)Saturated Fat: 6g (38%)Polyunsaturated Fat: 5gMonounsaturated Fat: 8gTrans Fat: 0.02gCholesterol: 41mg (14%)Sodium: 830mg (36%)Potassium: 264mg (8%)Fiber: 1g (4%)Sugar: 2g (2%)Vitamin A: 49IU (1%)Vitamin C: 2mg (2%)Calcium: 61mg (6%)Iron: 2mg (11%)

Notice: Nutrition is auto-calculated for your convenience. Where relevant, we recommend using your own nutrition calculations.

Buckeyes

Buckeyes

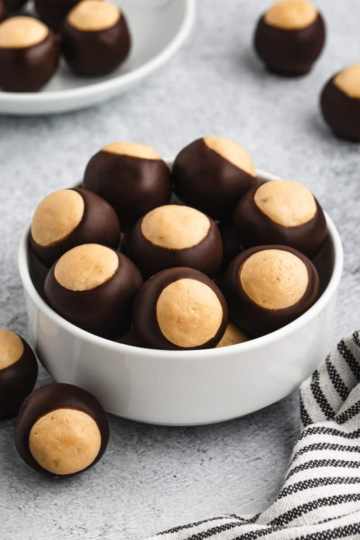
Buckeyes are rich, creamy, and irresistibly sweet treats made from peanut butter and chocolate. Bite-sized and perfect for sharing, they’re a classic candy that combines salty and sweet in every decadent, melt-in-your-mouth bite—ideal for holidays, parties, or anytime a little indulgence is needed. Prep Time:30 minsTotal 

Crab Rangoon Cups

Crab Rangoon Cups

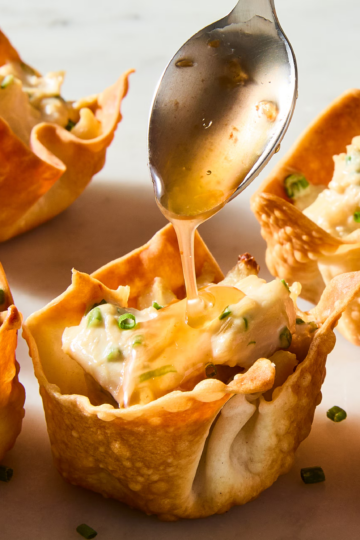
Crab Rangoon Cups are crispy, bite-sized appetizers filled with a creamy, savory crab mixture. Perfect for parties, gatherings, or a fun snack, they’re easy to make and full of flavor—delivering all the indulgence of the classic treat in a convenient, elegant package. Prep Time:5 minsCook Time:20 

Chuck Roast

Chuck Roast

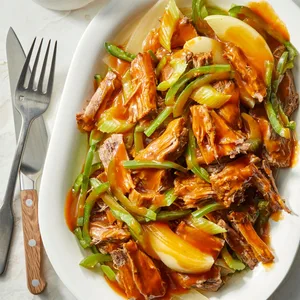
Chuck Roast is the ultimate comfort food cut rich, flavorful, and perfect for slow cooking. When cooked low and slow, it becomes tender, juicy, and melt-in-your-mouth delicious, making it ideal for hearty dinners, cozy meals, or any time a satisfying, flavorful roast is needed.

Prep Time20 min
Cook Time35 min
Yield6 servings

Ingredients

  • 1 can (14-1/2 ounces) Italian stewed tomatoes, undrained
  • 1/2 cup beef broth
  • 1/2 cup ketchup
  • 3 tablespoons brown sugar
  • 2 tablespoons Worcestershire sauce
  • 4 teaspoons prepared mustard
  • 3 garlic cloves, minced
  • 1 tablespoon soy sauce
  • 2 teaspoons pepper
  • 1/4 teaspoon crushed red pepper flakes
  • 1 large onion, halved and sliced
  • 1 medium green pepper, halved and sliced
  • 1 celery rib, chopped
  • 1 boneless beef chuck roast (2 to 3 pounds)
  • 3 tablespoons cornstarch
  • 1/4 cup cold water

Directions

1.In a bowl, mix first 10 ingredients. Place onion, green pepper and celery in a 6-qt. electric pressure cooker; place roast over top. Pour tomato mixture over roast. Lock lid; adjust to pressure-cook on high for 35 minutes. Allow pressure to naturally release for 10 minutes, then quick-release any remaining pressure.

    2.Remove roast and strain cooking juices, reserving vegetables; keep roast and vegetables warm. Skim fat from juices. Return juices to the pressure cooker. Select saute setting and adjust for low heat; bring juices to a boil. In a small bowl, mix cornstarch and water until smooth; stir into cooking juices. Cook and stir until sauce is thickened, 1-2 minutes.

    Nutrition Facts

    1 serving: 365 calories, 15g fat (6g saturated fat), 98mg cholesterol, 792mg sodium, 25g carbohydrate (16g sugars, 2g fiber), 31g protein.

    Chocolate Chip Banana Bread

    Chocolate Chip Banana Bread

    Chocolate Chip Banana Bread is moist and loaded with ripe bananas, and it’s studded with melty morsels of chocolate chips. You’ll love that it has plenty of banana flavor and stays moist for days. Prep Time: 10 minutes minsCook Time: 1 hour hrServings: 10 slices