Tag: EasyDessert

Pocky S’Mores

Pocky S’Mores

Cookie, chocolate, and marshmallow: the delicious flavors of a s’more, rearranged. Store-bought marshmallows are fine, though this dessert is even better with the homemade version. Try mixing and matching marshmallow and Pocky flavors to find your favorite combination. For example, strawberry-flavored marshmallows with matcha-flavored Pocky 

Strawberry Shortcakes

Strawberry Shortcakes

Strawberry shortcakes are easy to make, and you can leave it to your guests to do the assembly. Make the biscuits in the morning or even the night before. It takes just five minutes to prep the strawberries and, as opposed to whipped cream, the 

Granita

Granita

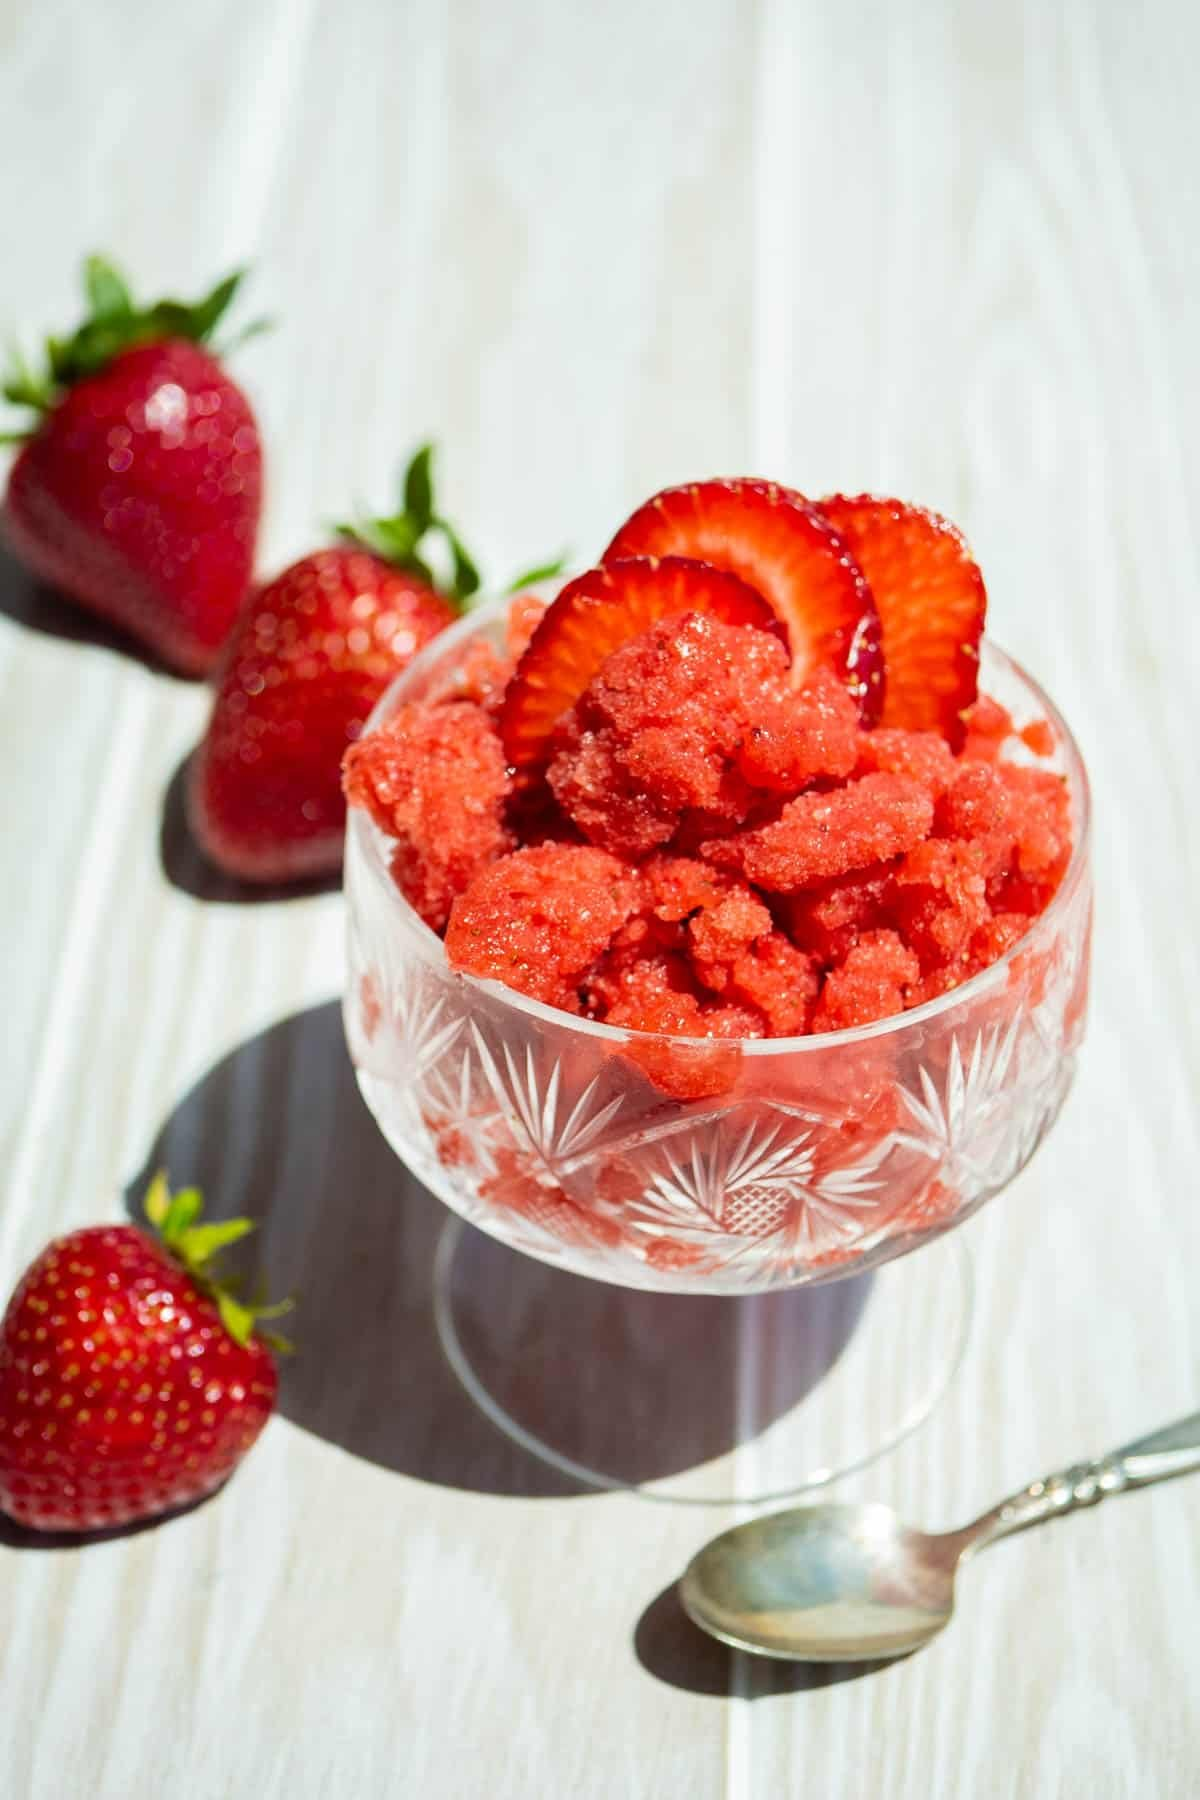
Cool down like an Italian with this icy frozen treat! You can use any seasonal fruit you’d like, or take a grown-up approach with freshly brewed coffee. Just be sure to adjust the sweetener to your taste—some fresh, ripe fruits are very sweet on their own, and may not require as much sweetener.

Prep – 10minutes mins
Freezing time – 2hours hrs
Serves – 4

Ingredients

For a Fruit Granita

  • ▢4 cups finely chopped fruit of your choice (like watermelon, peaches, strawberries, mixed berries, or oranges)
  • ▢1 cup water (or combination of water and juice, see note)
  • ▢1/3 cup cane sugar
  • ▢Sliced fruit, for garnish (optional)

For a Coffee Granita

  • ▢2 cups brewed coffee
  • ▢1/2 cup cane sugar
  • ▢Coffee beans, for garnish (optional)

Instructions 

  • Blend and freeze. To make a fruit granita, combine the fruit, water, and sugar into a blender or food processor and blend 30 seconds until smooth. For a coffee granita, mix the brewed coffee with the sugar until the sugar is dissolved. Taste and adjust the sweetness to your liking. Pour the mixture into a rimmed sheet pan or baking dish that’s at least 8X12–inches. Place in the freezer for one hour.
  • Scrape. After an hour, use a metal fork like a rake, scraping through the mixture to break up the ice. Return to the freezer for another 30 minutes to an hour.
  • Repeat. Continue scraping with a fork through the mixture every 30 minutes to an hour until it is fully frozen and the granita has a fluffy granulated texture. This should take about 2 hours in total if you have a large sheet tray, or longer if you’re using a smaller baking dish.
  • Serve or store. Scrape into a pile and scoop into chilled serving glasses to serve immediately, or scrape into an airtight container and return to the freezer until you’re ready to serve.

Notes

  • For an extra tart fruit granita: Replace half of the water with freshly squeezed lemon juice. 
  • Make it boozy: Adding a splash of liquor (like Grand Marnier for an orange granita, or coffee liqueur for a coffee granita). 
  • To speed up the freezing process: Place your sheet pans or baking pans in the freezer for 30 minutes before you get started.
  • Nutrition facts are calculated based on one serving of a coffee granita.

Nutrition

Calories: 97.4kcalCarbohydrates: 24.9gProtein: 0.1gFat: 0.1gSaturated Fat: 0.003gMonounsaturated Fat: 0.02gSodium: 2.6mgPotassium: 58.6mgSugar: 24.9gCalcium: 2.6mgIron: 0.03mg

Baked Apples

Baked Apples

These easy Baked Apples are infused with cinnamon and brown sugar from the inside out and taste like the filling for apple pie. Enjoy them as-is for a cozy fall treat, or serve them topped with whipped cream, ice cream, or caramel sauce. Prep Time: 

Plum Tarts

Plum Tarts

Imagine late summer captured in buttery pastry: jewel-toned plums melting into honeyed jam, their tart-sweet glow gilded beneath a crisp, golden shatter. Effortless as a sunset, these tarts turn ripe fruit and flour into moments of pure, sunlit alchemy. Recipe information Ingredients 3 medium red 

No-Bake Cheesecake

No-Bake Cheesecake

This is a light and fluffy, deliciously creamy cheesecake and the fresh blueberry sauce takes makes it over-the-top delicious! And here no turning on a hot oven and waiting the extra hour+ for a cheesecake to bake, and chill time is half what a standard cheesecake takes!

Prep30 minutes minutes
Chill3 hours hours
Servings9

Ingredients

  • 1 1/4 cups (138g) graham cracker crumbs (from about 9 full sheets)
  • 5 Tbsp (70g) salted butter, melted
  • 2 Tbsp cold water
  • 2 tsp powdered gelatin
  • 2/3 cup (155ml) heavy cream
  • 16 oz cream cheese, brought to room temperature
  • 1 1/4 cups (150g) powdered sugar
  • 1/3 cup (80g) sour cream brought to room temperature
  • 1 1/2 tsp vanilla extract

Instructions

  • Line an 8 by 8-inch baking dish with aluminum foil or parchment paper leaving a 2-inch overhang on all sides. Spray foil with non-stick cooking spray (parchment doesn’t need to be sprayed).
  • In a bowl, using a fork, stir together graham crackers and butter until evenly moistened. Pour mixture into prepared baking dish and press firmly into an even layer. Transfer to refrigerator.
  • Pour 2 Tbsp water into a small microwave safe bowl. Sprinkle gelatin evenly over water and immediately whisk. Allow to rest while preparing filling.
  • In a mixing bowl using an electric hand mixer (or 2-cup liquid measuring cup if your hand mixer will fit), whip heavy cream until stiff peaks form (it should get to the point it starts to loose that wet sheen).
  • In a separate mixing bowl mix cream cheese and powdered sugar on low speed until combined, then increase speed to high and whip until smooth, light and fluffy, about 2 minutes. Mix in sour cream and vanilla extract.
  • Heat gelatin mixture in microwave 10 to 15 seconds on high power until just dissolved, then whisk for 15 seconds. Cool until just warm, about 2 minutes. Then while mixing cream cheese mixture with hand mixer, drizzle gelatin mixture into cream cheese mixture and mix until combined.
  • Fold in whipped cream.
  • Spread cream cheese mixture over graham cracker layer in prepared baking dish. Cover with plastic wrap and chill until set, about 3 hours. Cut into squares and serve with blueberry sauce.

Notes

For the Blueberry Sauce

  • 10 oz (2 cups) fresh blueberries (can substitute raspberries)
  • 5 Tbsp juice (grape, berry or apple), or water
  • 1/3 cup (66g) granulated sugar
  •  2 1/2 tsp cornstarch
  • Directions: In a medium sauce pan stir together blueberries, 4 Tbsp juice and the sugar. Bring mixture to a simmer over medium-high, stirring frequently.
  • Reduce heat and simmer about 5 minutes until about half of the blueberries have burst. Stir together remaining 1 Tbsp juice and the cornstarch, whisk into blueberries, cook and stir 30 seconds longer.
  • Allow to cool and chill before serving over cheesecake.
Easy Chocolate Pudding

Easy Chocolate Pudding

Homemade chocolate pudding never disappoints. It’s familiar without being boring and has a luscious texture and rich chocolate flavor that, let’s be honest, is leagues ahead of even the best store-bought versions. It’s also the rare chocolate dessert that doesn’t require turning on your oven. 

Mini Biscoff Cheesecakes

Mini Biscoff Cheesecakes

These mini Biscoff cheesecakes are creamy, spiced, and indulgent, with a crisp biscuit base, smooth baked filling and a generous layer of Biscoff spread on top. Prep Time30 minutes minsCook Time20 minutes minsServings12 cheesecake Ingredients For the base For the filling For the topping Make 

Single Serve Chocolate Chip Cookie

Single Serve Chocolate Chip Cookie

There is NO better solution to sweet cravings than this Single Serve Chocolate Chip Cookie! It is thick, chunky, gooey, chocolatey, and takes only 30 minutes to make including the chilling time! And yes, this recipe does make just one cookie!

Cook Time: 10 min
Prep Time: 10 min
Yield: 1 cookie

Ingredients

  • 1.25 tbsp butter (18g)
  • 1 tbsp brown sugar, packed (13g)
  • ½ tbsp white sugar (7g)
  • ½ egg yolk
  • 3 tbsp flour (25g)
  • ⅛ tsp baking soda
  • Pinch of salt
  • 1 oz chopped dark chocolate (28g)

Instructions

  • Melt the butter in a small bowl in the microwave, using 8s increments
  • Add the white and brown sugar, and whisk for 1-2 minutes
  • Add half of an egg yolk and whisk again for 30-60 seconds. The mixture should look very smooth at this point
  • Sift in the flour, baking soda and salt, and use a small rubber spatula or spoon to very gently fold until the flour is almost combined (but not fully)
  • Add the chopped chocolate and continue to gently fold only until no more streaks of flour are visible. You should not overmix after adding the dry ingredients and chocolate!
  • The batter will be a bit runny at this point – don’t worry and chuck into the freezer for 10-15 minutes
  • In the meanwhile, pre-heat the oven to 375F and line a small baking sheet with parchment paper
  • Once the dough is chilled, gently form it into a ball, and place onto the baking sheet
  • Bake for just 10-12 minutes until the cookie is firm around the edges but a bit soft in the middle
  • Remove from the oven and let cool for 10-15 minutes before eating!

Notes

  • You should chill the cookie dough for a minimum of 10-15 minutes in the freezer. However, you can also chill for longer in the fridge, and more chilling will give better results in flavor and texture. I find 2 hours in the fridge to be optimum
  • It is best to use a light colored baking sheet, as baking on darker sheets will cause the cookie to become too brown and crispy on the bottom